|
1962 Triumph TR4 Restoration |
|
Brian Sanborn, Groton, MA |
New Interior
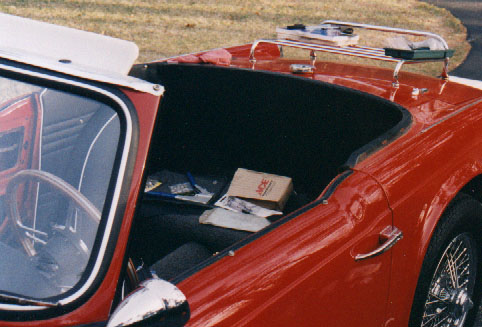
Replacing the interior is real hard work. Actually, I think I
would rather rebuild another engine than do another interior
job.. My old body doesn't like being twisted up like a pretzel. The space inside the TR4 cockpit, even with the seats
removed, is very tight and it is awkward getting into those the push
and pull positions that are needed to do the job.
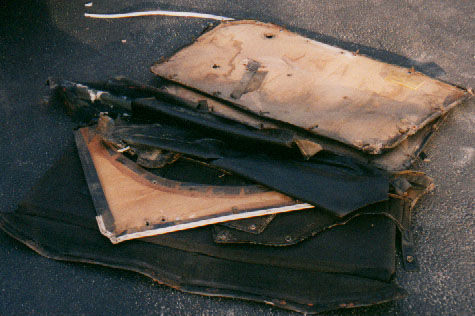
The installation of a new carpet set is covered in the Winter'98 section. The carpet that came with my car was so far gone... all I could do was throw it in the trash. I decided to install an inexpensive $150 set from a Triumph List member to hold me over. Actually it has turned out pretty good. It is the correct gray color and looks good in pictures and from 10 feet. On close inspection the quality of the nylon loop is not that good and the color is fading from the sun. Replacing it with the new TRF Magic Carpet original gray rayon loop set will make a good project for 2001.
Finding the Right Stuff
Planning on a new interior means finding a quality source for the replacement interior kit and the hood stick covers. In my opinion, the best source is The Roadster Factory (TRF). If they don't have any stock, which always happens when you need the stuff, then you should use John Skinner, Inc in the UK. I am convinced that TRF gets there stuff from John Skinner and the price directly from Skinner is very competitive even with the shipping. John also has everything that you ever wanted including those white sun visors... much more than TRF stocks.
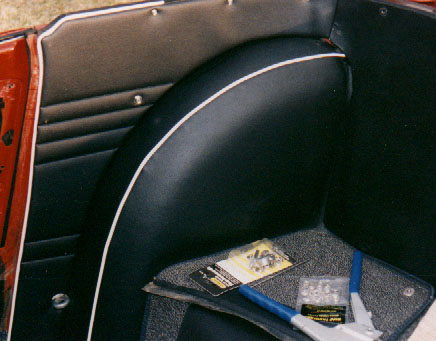
Both are good sources for real authentic original interior parts. Moss carries a very high quality kit that many of you will find suitable. However, they use a corded stitching method of creating the lines in the vinyl covered panels and hoodstick covers that just doesn't measure up for me... if you want the original look for your panels and hoodstick covers. The original TR4-4A panels were made using a welded vinyl method that bonded the surface vinyl and foam backing together forming a smooth indented line. For me nothing else will do.
The panel kit usually includes wheel well covers and padding, door panels, quarter panels that cover the area behind the B post and the small triangle area at the base of the B-post. TRF sells the vinyl covered back panel separately, while Moss includes it. The hoodstick covers from Moss and TRF are both excellent quality. However you should get both of these kits from the same source. The color and feel of the vinyl, as well as the construction details should be the same.
Restoring the seats is covered on another page. But the recommendations for sources remains the same with the exception that Moss and TRF both have excellent quality leather seat kits. I have not compared the vinyl versions but assume they the same high quality level.
Where to Start
 Start by removing the seats and seat rails. This will give you the room
you need to work. Remove the hoodstick frame assembly.
This is a good time to renew the webbing and paint the
frame. Remove the three shinny molding pieces that hold
on the three pieces of hoodstick cover. Strip off all the old
interior panel pieces from the B-post and quarter panel. Carefully
peel back the vinyl covering on the wheel wells. But for the time
being... only remove one wheel well side. You will find it easier
to use the old one as a template for lining up the piping seam. You
may find that the original cotton padding is still intact.
Leave it in place if it is not damaged as forming a new piece is
difficult. Remove the door panels.
Start by removing the seats and seat rails. This will give you the room
you need to work. Remove the hoodstick frame assembly.
This is a good time to renew the webbing and paint the
frame. Remove the three shinny molding pieces that hold
on the three pieces of hoodstick cover. Strip off all the old
interior panel pieces from the B-post and quarter panel. Carefully
peel back the vinyl covering on the wheel wells. But for the time
being... only remove one wheel well side. You will find it easier
to use the old one as a template for lining up the piping seam. You
may find that the original cotton padding is still intact.
Leave it in place if it is not damaged as forming a new piece is
difficult. Remove the door panels.
Save all the clips and screws. However, it's a good idea to get the TRF interior hardware kit that contains all new chrome screws, snaps, grommets and panel clips. You will find that the old hardware is rusty and sometimes broken.
 Start putting in the new pieces with the wheel
well covering. This is one of the trickier jobs. It
takes a lot of experimenting and pulling to get it right. A
heat gun or hair dryer is a good tool here. I started the wheel
well piece by first positioning then gluing the bottom half
while paying attention to the line up of the piping seam. Use 3M
spray adhesive in the big black spray can. Then pull on the
top half so that it all smoothes out and clings to the wheel well
shape. You will have to trim and in some cases relieve the
edges as needed.
Start putting in the new pieces with the wheel
well covering. This is one of the trickier jobs. It
takes a lot of experimenting and pulling to get it right. A
heat gun or hair dryer is a good tool here. I started the wheel
well piece by first positioning then gluing the bottom half
while paying attention to the line up of the piping seam. Use 3M
spray adhesive in the big black spray can. Then pull on the
top half so that it all smoothes out and clings to the wheel well
shape. You will have to trim and in some cases relieve the
edges as needed.
Cover the B-posts next with the vinyl pieces provided in the kit. The quarter panels can go on next. Be sure to make holes for the hoodstick base plates. The hoodstick covers need to be installed next. You need to install snaps but wait until the hoodstick frame is back in place to make sure you leave room for the folded frame. Clean and re-install the anodized aluminum moldings that retain the hoodstick covers. The bottom tabs on the hoodstick cover back panel is punched and brass grometted to fit over the Lift-the-Dot pegs at the rear edge of the ledge carpeting. The last bit is the little triangular pieces that fit at the bottom of the B-post.
Doors Panels
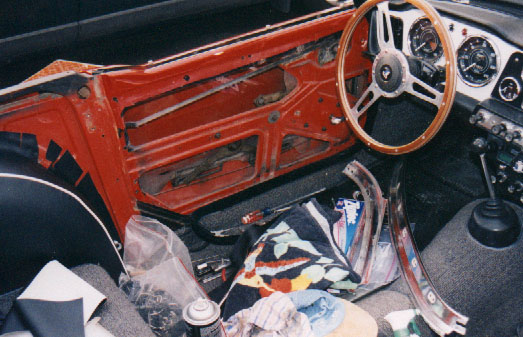
The door panels are next. The door handles must removed. Use a punch or long nail to drive out the pin that hold on the handles. Be careful not to chew up the plastic bezels behind the metal handles. You can order new ones from Moss if yours are a mess.
Remove the two screws at either ends of the map pockets. Then pop off the old panels. Use one of those special tools if you can find one. Otherwise a use thin paint scrapper or wood chisel. You want to pop off the old panels but don't want to damage the paint around the edges of the panels.
This is a good time to consider any work you may want to do on the door glass channels. Most old TR4s have rattling glass in the doors because the window channel "fuzzy stuff" is worn or gone. You can buy new channel assemblies or you can rebuild the original ones with new fuzzy material. It's also a good time to replace door waist seals that run along the top of the door. They seal and hold the glass. Lastly you should check the alignment of the door glass with the top and the windshield frame. While I was at it, I also replaced the old hard rubber door seals with new ones. The fuzzy draft seals were replaced somewhere along the line by a previous owner and were still useable. They are pretty expensive, so I kept the old ones.
Putting the new panels on is a difficult job in a awkward position. Advil works real well here. You must realign all the clips with the old holes in the door. Doesn't sound so difficult.... but try it. Then the door handles and door pull can be reinstalled. This is another tricky thing to learn. A good pair of needle nose pliers is needed. You have to push back the plastic bezel and insert a long metal pin or scribe... or piece of strong clothes hanger wire... then insert the short pin with the needle nose pliers and push out the coat hanger wire and like magic it all comes together. It should take about 20 minutes of retries and swearing to get the first one and then the rest will be easier. That just about does it. The new seats can go in now... but that's another story.