|
1962 Triumph TR4 Restoration |
|
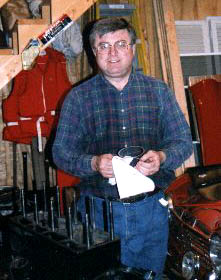
Brian Sanborn, Groton, MA |
Engine Rebuild
What's This Part For?
Rebuilding the engine on a TR4 is a big undertaking. But as engines go, it is a fairly simple and straight forward design. The 4-cylinder engine in the TR4 is based on a 1950's engine used by Triumph in a Vanguard saloon car. Most of the basic mechanical parts used in the TRs were borrowed from there regular sedan business. The engine has one distinctive design element. It uses a wet liner design that makes rebuilding a bit easier and allows the engine to be rebuilt over and over again. These long life qualities also made it a good choice for use in Furgeson Tractors. To this day, in a pinch, you can get engine parts from a local farm tractor dealer.
Wet Liner Design
Instead of the normal approach where the cylinder bores are cast into the block, the TR engine uses individual sleeves that look like jugs with the bottom cut out. The liners fit into the open water jacket part of the block and are held in place by the head. The design allows you to change the displacement of the engine just by swapping in new liners and larger pistons. With many improvements, the base Vangaurd engine, with a displacement to 1991cc, was used for the TR2 and TR3 and then displacement was increased to 2138cc for the TR4. The TR2 and TR3 used a 83 mm piston/liner set and the stock TR4 used a 86 mm set. The popular thing to do today is to use an 87 mm piston/liner set. This is actually a .040 thousands oversize piston and liner bored to match. This is what I used for my rebuild.
You can take a more conservative and less costly approach, by reusing the pistons and honing the liners and just replacing the rings. This could be done on and engine with lower mileage. You have to measure very carefully for all the tolerances. I would not recommend this option. I see many guys that go this route complain of rings not seating, piston slap or other problems. If you have gone this far you should at least replace the pistons with .010 oversize and have the liners rebored and honed. I replaced the pistons and liners, so that I could start from a solid base. I had no history on the engine. All I did know, was that it had lots of miles on it because the internal parts showed signs of heavy wear.
Disassembly
The first job is taking the engine apart. The engine/gearbox should be sitting on a strong mover's dolly or similar arrangement. Before you let your "engine pull" team leave, make sure you separate the gearbox from the engine. Then remove the flywheel. Loosen or remove the bolts that hold down the rear seal halves now because they will be hard to get at when the block is on the engine stand. Now you can mount the engine on a sturdy engine stand. This allows you to do all the disassembly, inspection and reassembly work in a safe and convenient way.
The head should be loose and only held in place for the engine pull. Now is the time to remove it. It will go easier if you rotate the block to a horizontal position. Use a rubber hammer and start moving the head up the studs and off the engine. Check out the piston tops and the condition of the valves. Normally you should have the head rebuilt by a machine shop with new valves, bronze guides and springs. And while you're at it, for a little more you can have modern valve seals and hardened seats installed. It's possible to do the work yourself, but most folks send it out as I did.
Remove the Oil Pan
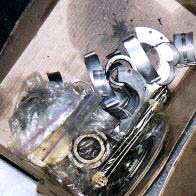
The next thing I did was to remove the oil pan to check out the serious bits of the engine. I suspected worn rod and main bearings or a worn oil pump. Turn over the block using the stand. Remove all the oil pan bolts and bag them. Make a note of the position of the longer bolts. The inside of the block should be oily but clean and free of debris. Any loose bits here is a big problem and the source must be traced. Inspect the crankshaft and connecting rods for damage. The oil pump and screen are first to come out. Bag it and put it aside for later measurements to see if it will pass muster, need rebuilding or you may need a new one like I did.
Now Remove the Heart and Lungs
 You
can now remove rod bearing caps. Be sure to check that they are numbered. They must be reinstalled in the same
position. This is where most of the wear will be found. The bearing shell may, or may not, come off with the cap.
If it sticks to the crankshaft surface just push it off with a wood dowel or other non-metal tool. The face of
the rod bearings on my engine were badly worn and scored. Much worse than I had imagined. Based on what I found,
the engine may not have lasted another season without serious damage. However the connecting rod "big-ends"
and the crank rod journals were undamaged.
You
can now remove rod bearing caps. Be sure to check that they are numbered. They must be reinstalled in the same
position. This is where most of the wear will be found. The bearing shell may, or may not, come off with the cap.
If it sticks to the crankshaft surface just push it off with a wood dowel or other non-metal tool. The face of
the rod bearings on my engine were badly worn and scored. Much worse than I had imagined. Based on what I found,
the engine may not have lasted another season without serious damage. However the connecting rod "big-ends"
and the crank rod journals were undamaged.
I was able to push the pistons out of the top of the engine without having to "ream the ridge". The ridge is a lip that gets worn into the top of the cylinder bore from the rings riding in the bore. You may get away with it or you may have to grind this ridge off with a "ridge reamer tool" that is carried at all auto stores. If you intend to replace the pistons and liners you can bang a little harder or try to pop out the liner from the block with the piston still in the liner. Unless you're very lucky, the liner will not want to come out easily. But, before trying to remove the liners, with or without pistons in place, you should remove the crankshaft.
Loosen the main bearing caps. This is best done with a long breaker bar and socket. The middle cap will come off with little fuss. The rear cap is a tight fit and is stuck with sealer from the previous rebuild. This will take some doing to remove. Start by loosening the bolts on the rear seal assembly. The proper way is with a tool that "pulls" the cap up like a pulley puller. You can see the tool in the workshop manual. I removed mine by using a rubber mallet. Not very slick, but it works. You tap away at the bearing cap... rocking it back and forth and upward. This takes a good 15 minutes. Be gentle and don't damage anything, these caps are line-bored at the factory and unique to that block.
The front bearing cap is under the front seal bridge. Before you can get this all the way off you must remove the front timing chain cover. This means the front pulley must be removed. Use a good size pulley puller for this job. Don't lose the the little double keyways on the crankshaft end. Now you can remove the two slotted screws of the seal and rock the seal out of position. These screw heads can strip easily if you don't use a real fat, big screw driver. The front bearing cap is now exposed and can removed by rocking back and forth and upward.
These main bearings should be checked for scoring and the journal surface of the crankshaft should be checked for visible damage. You can now remove the crankshaft. Set it aside in a plastic bag with the other stuff going to the machine shop. You now have free access to the bottom of the piston liners. If you intend to reuse your liners you must be very careful getting the liners out. The bottom skirt of the liners is very brittle and will chip off if hit too hard. It may make sense to let the machine shop do this. I my case, I was not reusing them so I pounded them out using a soft piece of wood and rubber mallet. I was very careful, but still managed to crack one of the skirts on a particularly stuck liner. I am told that it is not unusual to find a piece of this skirt material in the oil pan.
The Camshaft is Next
Now we can remove the timing chain, sprockets and the camshaft.  Be sure to make a mark on the timing sprocket gears
to show where they line up. The mark should be there from the factory or the last rebuild. You will see a mark
chiseled into a tooth on each gear. The camshaft and crankshaft are lined up properly when the two marks come together
at the 2 o'clock and 7 o'clock positions. You can use this mark to help you "time" the camshaft during
the reassembly stage. Unless you know the engine has low mileage on the last rebuild, it is a good idea to replace
the timing chain, tensioner and timing gears.
Be sure to make a mark on the timing sprocket gears
to show where they line up. The mark should be there from the factory or the last rebuild. You will see a mark
chiseled into a tooth on each gear. The camshaft and crankshaft are lined up properly when the two marks come together
at the 2 o'clock and 7 o'clock positions. You can use this mark to help you "time" the camshaft during
the reassembly stage. Unless you know the engine has low mileage on the last rebuild, it is a good idea to replace
the timing chain, tensioner and timing gears.
Remove the two bolts holding down the front camshaft bearing and remove the bearing. Unless this is visibly damaged, it will most likely be reused. Back out the camshaft carefully as it skips from bearing to bearing. Check the camshaft for signs of wear. Mine was scored and not reusable and I had to buy a new one. You should be able to refurbish a good camshaft. The new camshaft bearings are "pressed" into the block. Have this done by the machine shop folks.
Off to the Machine Shop
It's time now to gather all the bits going to the machine shop. The block goes for general cleaning, having the oil galleries reamed clean and optional painting of the exterior. The crankshaft needs cleaning, measuring and regrinding if needed. The head will go for a cleaning and complete rework of new valves, guides, springs and optional hardened seats and modern valve stem seals. The machine shop will also grind off a little bit of the surface of the head to true it up to a perfect flat surface.
The connecting rods go out for measuring to see if they are straight and for fitting of new small end bushings. I also sent out the rockers for new bushings and to have the worn surfaces refaced and hardened. The part of the rocker that rides on top of the valve gets beat up pretty bad over 90,000 miles and the indentation needs to be ground smooth and re-hardened. This is much cheaper than buying 8 new ones.
The flywheel and new clutch housing goes along as well. The machine shop should balance these two parts and refurbish the flat surface where the clutch disk rides. You can go a step further for some more money and have all the moving bits of the engine balanced. I asked the machine shop owner to check the balance on my parts to see if a benefit could be had from a full balance job. He told me that everything was within the tolerances he could achieve from a balancing job, so I did not have this done.
And Now for Something Completely Different
While you wait for the machine shop to get around to your funny little engine.... and this can be a lot more time than you had planned..... You can use the time for parts cleaning and other projects. I had a 2 month + wait for my block parts and a 4 month wait to get the head back. They like working on all the exotic V8 and racing engines rather than old fashioned LBC engines. Just keep pestering the guy on a regular schedule and try to get back the short block stuff first so you can start on the build up. I used this time to work on the dash and start rebuilding the gearbox.
 During
this time I had to look for the parts that would be needed to retro the engine breather system back to its original
1962 open breather setup. This would mean finding a new valve cover without the PCV valve hose port and a breather
siphon pipe for the bottom rear right side of the engine. This would solve the random idle problem and positive
pressure problem from a faulty PCV design and make the engine look more original even though it had a TR4A heart.
During
this time I had to look for the parts that would be needed to retro the engine breather system back to its original
1962 open breather setup. This would mean finding a new valve cover without the PCV valve hose port and a breather
siphon pipe for the bottom rear right side of the engine. This would solve the random idle problem and positive
pressure problem from a faulty PCV design and make the engine look more original even though it had a TR4A heart.