|
1962 Triumph TR4 Restoration |
|
Brian Sanborn, Groton, MA |
Pulling The Engine
Once you get to this stage, there's no going back.
You are committed.
Credits
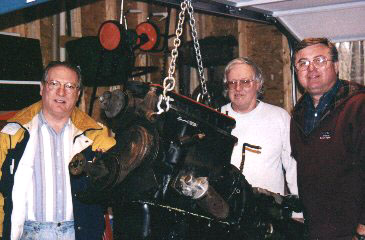
That's me on right with Barry Fox in the middle and Dave Perrin on the left. Barry owns a really nice TR4A that he drives as a full time driver. I meet him at the local Mazda dealer, right around the time I started thinking about getting a TR4. He gave me a top-down ride in his car. This made me really want a TR4 of my own. Dave is a great friend and neighbor and a UK expat as well. So we have the proper British accent around.
Getting Ready
If you can, I would recommend that you clean the engine and engine bay with a degreaser and hot water. Be careful with this if you have a blacktop driveway. I did some damage to mine. If you plan in advance you can do it at one of those self-serve car wash places with concrete floors, while the car is still mobile.
You need to line up some tools for this job. Buy or rent an engine hoist. I rented mine for $45. I don't have room to store one of my own and don't plan to do this every winter. You can buy one for under $200. The next thing is to buy an inexpensive engine stand to mount the block on when the engine is out. I got mine at AutoZone for $49. And last, is to rig a way of lashing a cable to the engine.
On the engine, there should be a front hoist eye on the drivers side front of the engine, bolted to the front cover. The other end of the chain needs to be attached to the rear right hand side of the head. You can jury rig a solution or order the TR rear hoist bracket from Moss for $13. Make sure to bolt this securely to the manifold stud and the right rear head stud. The best way to attach the chain to the hoist eyes is with two marine style shackles that you can get at a hardware store. They look like a "U" with a threaded pin that closes the top of the "U".
The Procedure
There is a sequence to follow when taking out the engine. Drain the oil and water, including the drain on the rear of the engine block. This may be clogged with sediment and rust scale. Clear it with a piece of wire until the water around the piston liners is drained.
You must remove the gearbox cover to allow you to get at the rear engine mount which is attached to the end of the gearbox. If you have not already done so, remove the radiator and bonnet. Strip the engine of all the accessories. Anything that can be broken from an unplanned whack from the dangling engine should be removed. You should now remove the carburetors, linkage and intake manifold as a single unit. I purposely didn't rebuild the SU HS6s with the engine rebuild. I wanted to keep some of the variables unchanged. If the engine wouldn't start at the end, I didn't want to be second guessing the carbs. I did the same with the distributor. Both went away in a box bagged for the springtime. Stuff paper or rags in the openings.
Continue to strip off the engine bits. Remove the exhaust manifold, generator, water pump, coil, fuel pump, oil pressure lines and oil filter housing. Watch the fuel line. This is really a problem with the TR4. There is no fuel shutoff valve. So you have to be ready to plug the fuel line quickly when you slip it off the fuel pump or you will have a large puddle of gas on the floor from the gravity feed from the gas tank. I solved the problem by installing a plastic fuel shut-off valve in the short piece of rubber fuel line just before the fuel pump. The valve is used on lawn tractors and snowblowers. This allows me to isolate the fuel tank whenever needed.
There are two more "must do" tasks before you think about lifting out the engine. The first is loosen the big bolt that holds the fan and fan extension onto the end of the crankshaft. Put the gearbox in 4th gear and chock the wheels. It will take a breaker bar and lots of grunt. This is very hard to do after the engine is out of the car.
The last thing is to loosen the head. The head may be quite stuck onto the block. Reattach the battery cable. The starter is still in place. Make sure the plugs are in and the wires disconnected. Loosen the head bolts and run them way up the studs. Now you can crank the engine with the starter and use the compression of the cylinders to pump the head loose. This worked for me in 2 or 3 seconds. If this won't budge it, the other method is to crank the engine using the breaker bar so the number one piston is about 80% up to the top. Then remove all the plugs and push some rope or clothesline into the number one cylinder spark plug hole until it fills the space. Leave the end of the rope hanging out. Now crank the engine, with the breaker bar, using all your strength and the leverage of the crankshaft will push on the front end of the head when the piston hits the rope.
Now we actually get to pull the engine. Loosen all the motor mounts and be sure to remove all the ground cables.
Open Wide This Won't Hurt
The engine comes out pretty easily compared to some cars I know. The goal is to not damage anything and don't
drop it. With the chain bridle attached at the front and back lifting points, attach the bridle to the lifting
chain to the front of center. This will cause the engine to lift first in the front and to hang from the chain
with a downward angle with gearbox low.
The front engine mounts will need a little persuading to pop off the mounting bolt. Start lifting very carefully
and slowly. The idea is to come up and out
coming forward as you lift in order to clear the front valance. At
the same time you must push down on the gearbox tail to allow the gearbox bell housing to clear the bulkhead by
the battery and throttle control. Once you have the engine clear, push the car back from under the engine and lower
the engine onto a strong mover's dolly with a 3/4 inch plywood board on top to support the engine pan.
|
|